
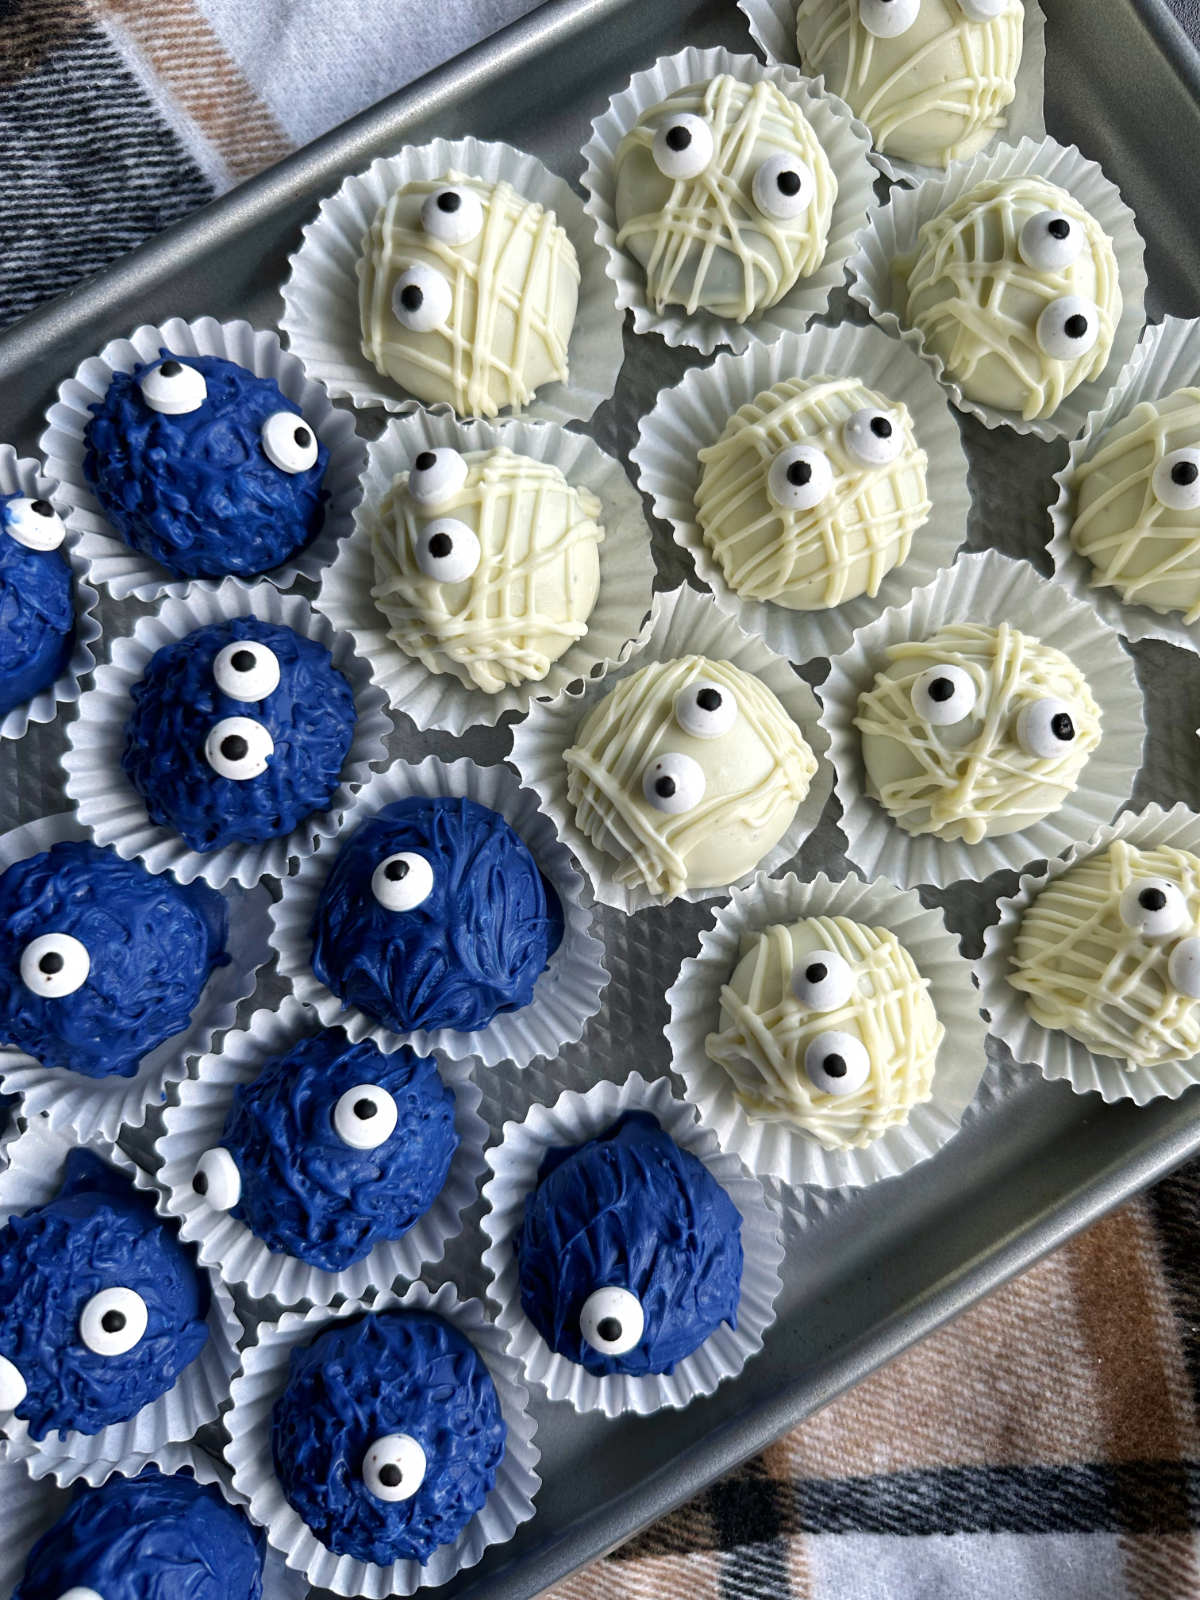
It may be Spooky Season, but these Halloween Oreo Truffles are more of a treat than a trick! Using only five ingredients, these monster-themed bites are a great holiday activity to make with the family. And the truffles are truly addicting!
I'm going to give you guys a secret... If you ever want to impress guests at a gathering or event, bring a few batches of Oreo truffles to the party. They will fly off of the tables every time!
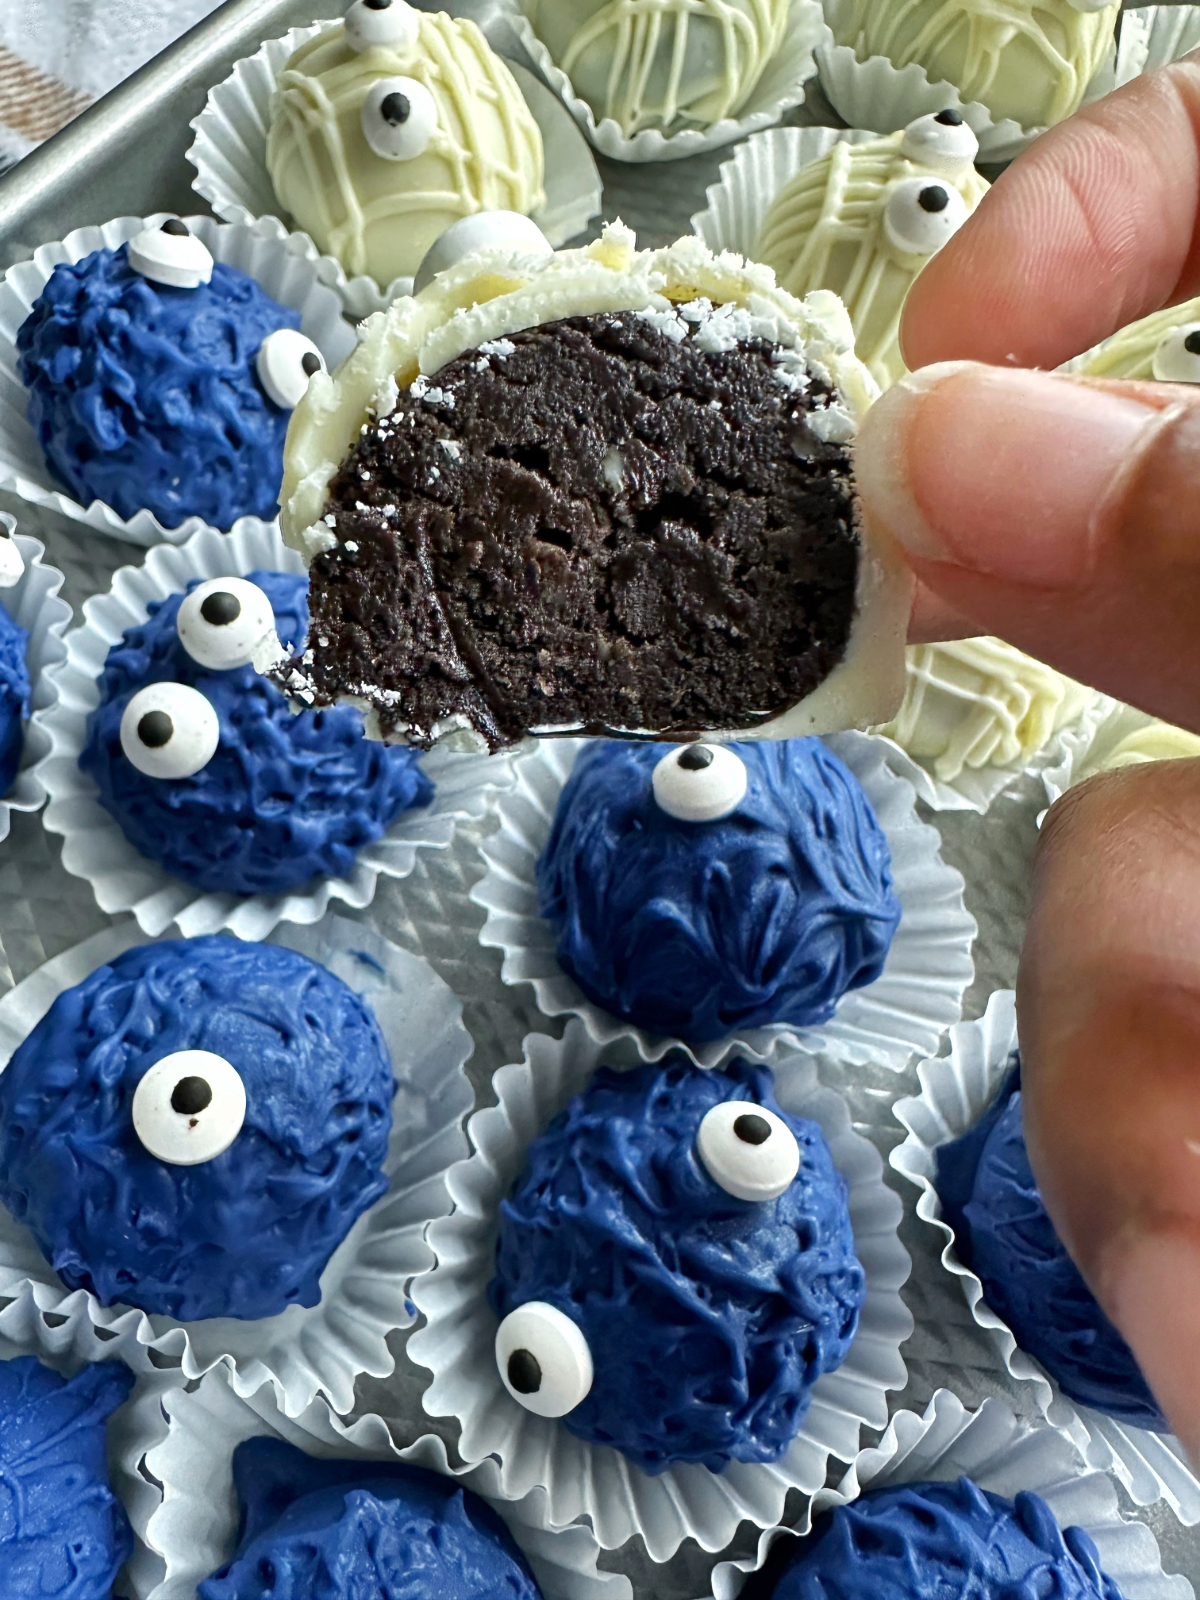
Oreo Truffles taste a bit like a chocolate-dipped fudge brownie, but lighter. They are incredibly decadent, but really easy to make - the most tedious part is rolling the truffles. Make this a fun family event to do with the kiddos, and create cool Halloween recipe traditions!
The Coined Breakdown
- Total Cost per serving (about 6): $1.68
- Total Cost (about 28 truffles): $8.88
- Those Other Guys: $22.00 per box
Ingredients
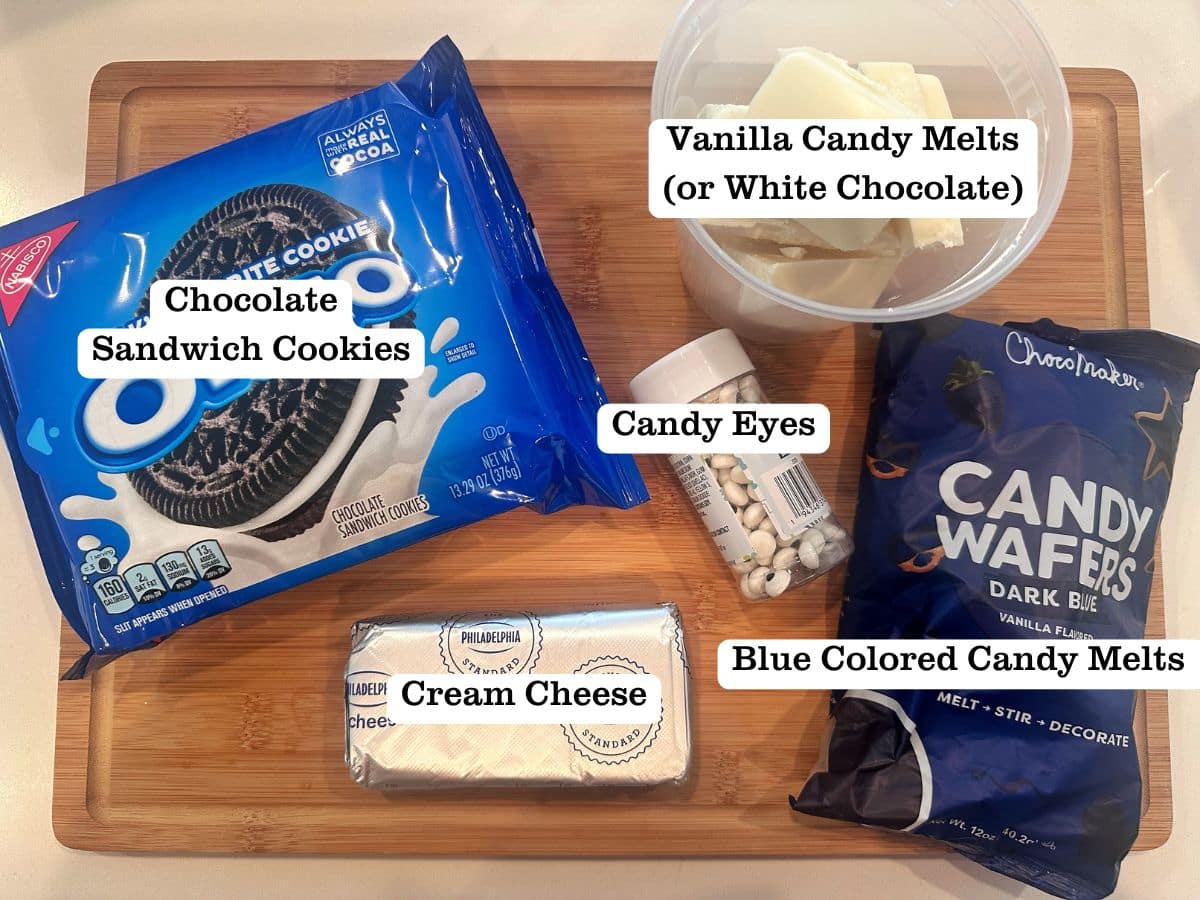
- Oreos - The base of these Oreo truffles, obviously, are Oreo sandwich cookies! Use the regular kind, not the double stuffed, and crush these into a fine powder using a food processor or blender.
- Cream Cheese - Cream cheese brings everything together, although you can't taste it in the final product. People are shocked to know that you only need 2 ingredients to make the base for these delicious truffles!
- Candy Coating/Candy Melts - You can find these in the baking aisle at your local grocery store. Simply melt these according to the package instructions; they usually give guidance on using the microwave or stovetop.
Variations and Substitutions
Vanilla Oreo Truffles: Use golden Oreos instead of the chocolate variety. These are great for those who don't like chocolate, as both of the candy melts we're using today are vanilla flavored.
Melted Chocolate: If you don't want to use candy melts, regular chocolate bars or chocolate chips will work as well! I recommend stirring in a teaspoon or so of coconut oil or vegetable oil, to ensure the chocolate is silky smooth.
How to Make Oreo Truffles for Halloween
These look like they take a lot of effort, but they're incredibly easy to make!
The best part of decorating them as "monsters" is that you have a bit of freedom on the final look. Dipping treats in chocolate can be daunting for beginners, but monsters are supposed to be ugly anyway - so you don't have to worry about getting the chocolate coating to be picture perfect!
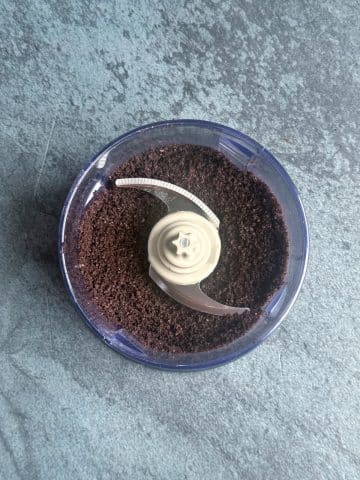
Step 1: To begin, crush your Oreo sandwich cookies in a food processor until you have fine crumbs.
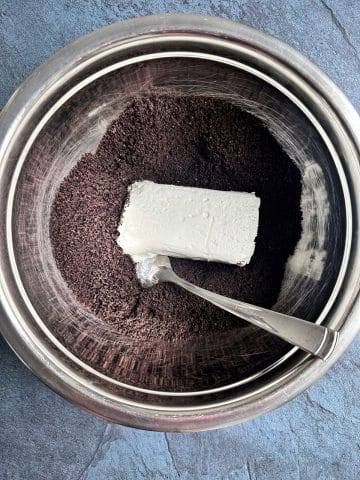
Step 2: Transfer the cookie crumbs to a bowl, and add one block (8 ounces) of softened cream cheese.
Mix well until a thick dough forms.
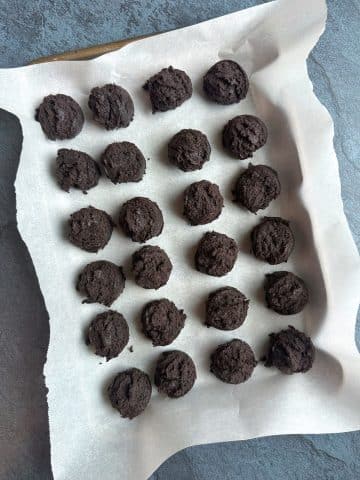
Step 3: Using a mini cookie scoop, portion out the mixture into even-sized pieces.
I like to separate into two separate pans for the two decorations we're going to be doing.
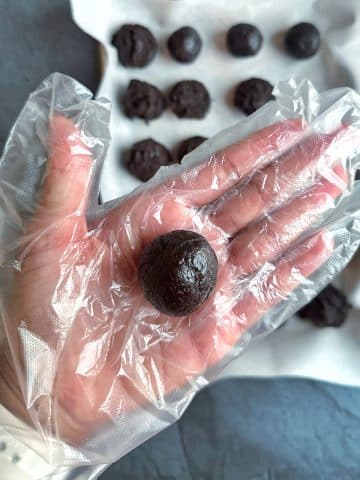
Step 4: Use your hands to gently roll each piece into a smooth ball.
Place these into a freezer for 10 minutes.
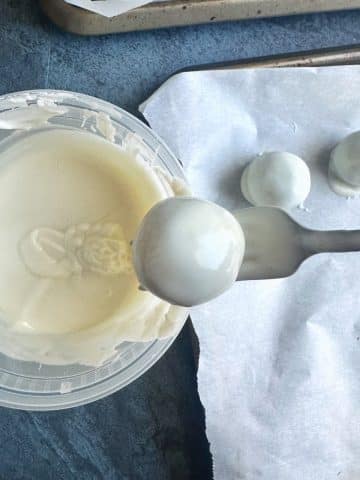
Step 5: For the mummy truffles, dip them into a bowl of melted vanilla candy wafers.
Add the dipped truffles back to the parchment-lined paper.

Step 6: Pour the remaining melted chocolate into a pastry bag or Ziploc bag, and snip off a small corner.
Drizzle lines onto the truffles to look like mummy wraps. Pipe a dot of chocolate onto the back of the mini candy eyes, and place them on top.
Place into the fridge until they're fully set.
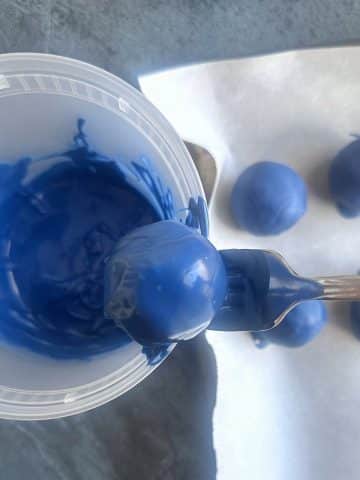
Step 7: For the monster truffles, dip them into a bowl of melted royal blue candy wafers.
Add the dipped truffles back to the parchment-lined paper and pour the remaining melted chocolate into a pastry bag or Ziploc bag. Snip off a small corner.
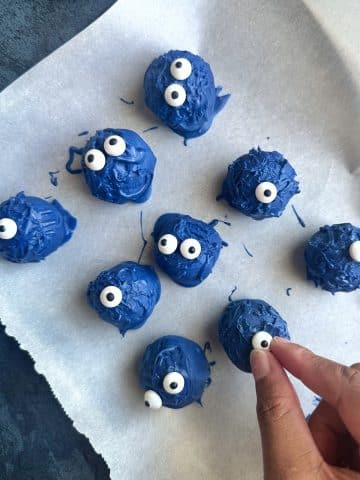
Step 8: Drizzle excess chocolate onto the monster truffles, then use a toothpick to add texture resembling fur.
Pipe a dot of chocolate onto the back of the mini candy eyes, and place them on top.
Place into the fridge until they're fully set. That's it!
Recipe Pro Tips
- Don't be afraid to freeze/refrigerate. Especially if your home is warmer - I recommend adding the truffles to the refrigerator when you aren't actively working with them. This allows the chocolate to fully set.
- Package 'em pretty. I love to place the final Halloween Oreo Truffles in mini cupcake liners. This avoids a bunch of mess when it's time to serve, especially for a party!
Recipe FAQs
Be sure to use the regular Oreos - double stuffed or thins won't work. I've tested this recipe with both full-fat and low-fat cream cheese, and that shouldn't make a difference.
In addition, using a food processor will give you the best cookie crumbs. If they aren't finely processed, it could affect the truffle dough!
The hydrogenated oil from the Oreos could be leaking out of the bottom. Yes, Oreos are vegan and use oil instead of dairy!
To prevent this, be sure that you don't have any gaps in your chocolate coating. The bottoms specifically should be completely coated - sometimes a small hole will form when you set them on the parchment paper.
Yes of course!
In the refrigerator, these will keep in an airtight container for a week.
You can also freeze these by storing them in an airtight container or a freezer-safe plastic bag. Frozen Oreo truffles will last for 3 months. Defrost overnight in the fridge when you're ready to eat.
Other Halloween Treats You'll Crave!


If you tried this Halloween Oreo Truffles Recipe, or any other recipe on my website, please leave a star rating and let me know how it went in the comments below. I love hearing from you! Thanks for visiting!

Halloween Oreo Truffles (Only 5 Ingredients!)
Equipment
- Food Processor or blender
- Mini Cookie Scoop
- 2 Deli Containers
- Disposable Food Prep Gloves optional
- Parchment Paper
- 2 Sheet Pans
- 2 Forks or other dipping tools
- 2 Pastry Bags or resealable plastic bags
- Toothpick
Ingredients
- 8 ounces cream cheese softened
- 13.29 ounces Oreo sandwich cookies
- 8 ounces vanilla candy melts
- 8 ounces royal blue-colored candy melts
- 1 jar mini candy eyeballs
Instructions
- Set the cream cheese on the counter at room temperature until it's softened.
- Using a food processor or blender, crush the Oreos into a fine powder.
- Mix the cookie crumbles and cream cheese in a large bowl until combined. A thick dough should form. Place the bowl in the freezer for about 10 minutes.
- Using a mini cookie scoop, portion out the truffle mixture and add them to a parchment-lined sheet pan.
- Using your hands, smoothly roll them into balls. Place in the freezer for another 10 minutes.
- Pour the candy melts into plastic deli containers, and melt according to package instructions.
Mummy Truffles
- Dip the truffle balls into the melted white chocolate, using a fork, and set them back on the parchment paper. Freeze for 5-10 minutes until solid.
- Add the remaining white chocolate to a pastry bag (or a resealable bag with the corner snipped off.) Make drizzles onto the truffles to resemble mummy wraps.
- Add a dot of white chocolate to the back of candy eyeballs and stick them onto the truffles. Refrigerate until solid.
Monster Truffles
- Dip the truffle balls into the melted blue candy melts, using a fork, and set them on parchment paper. Freeze for 5-10 minutes until solid.
- Add the remaining melted blue candy melts to a pastry bag or a Ziploc bag with the corner snipped off. Make random drizzles onto the truffles.
- Using a knife or toothpick, agitate the chocolate while it's still wet to create a "fur" effect. You can also pipe the chocolate on, although this uses up a lot more chocolate.
- Add a dot of chocolate to the back of the candy eyeballs and randomly place them onto the truffles, to create a monster look. Refrigerate until solid.
- Enjoy, and Happy Halloween!
Mary says
These truffles are delicious!! I found your recipe on Pinterest and tried them out. Please post more often on there so I can have even more of your recipes!
Shani W. says
Thanks Mary! I will definitely post more 🙂