Coined Cuisine

  • About
    • Frequently Asked Questions
    • Privacy Policy
  • Recipe Index
  • Shop
  • Subscribe
  • 0 items
menu icon
go to homepage
  • About
    • Frequently Asked Questions
    • Privacy Policy
  • Recipe Index
  • Cinco de Mayo
  • Shop
  • Subscribe
    • Facebook
    • Instagram
    • Pinterest
    • TikTok
  • subscribe
    search icon
    Homepage link
    • About
      • Frequently Asked Questions
      • Privacy Policy
    • Recipe Index
    • Cinco de Mayo
    • Shop
    • Subscribe
    • Facebook
    • Instagram
    • Pinterest
    • TikTok
  • ×
    Home » Recipes » Desserts

    Chewy Brown Butter Rice Krispie Treats

    Headshot of Shani, founder of Coined Cuisine
    Modified: Jan 26, 2026 · Published: Jan 26, 2026 by Shani H. · This post may contain affiliate links · 2 Comments
    Jump to Recipe Print Recipe

    Brown Butter Rice Krispie Treats are such a delicious and easy twist on a classic treat! The browned butter gives a beautiful depth of flavor, and the cereal is tossed in lots of melted marshmallows for a soft and chewy bite every time.

    A pair of hands pulling apart a homemade Rice Krispie treat.

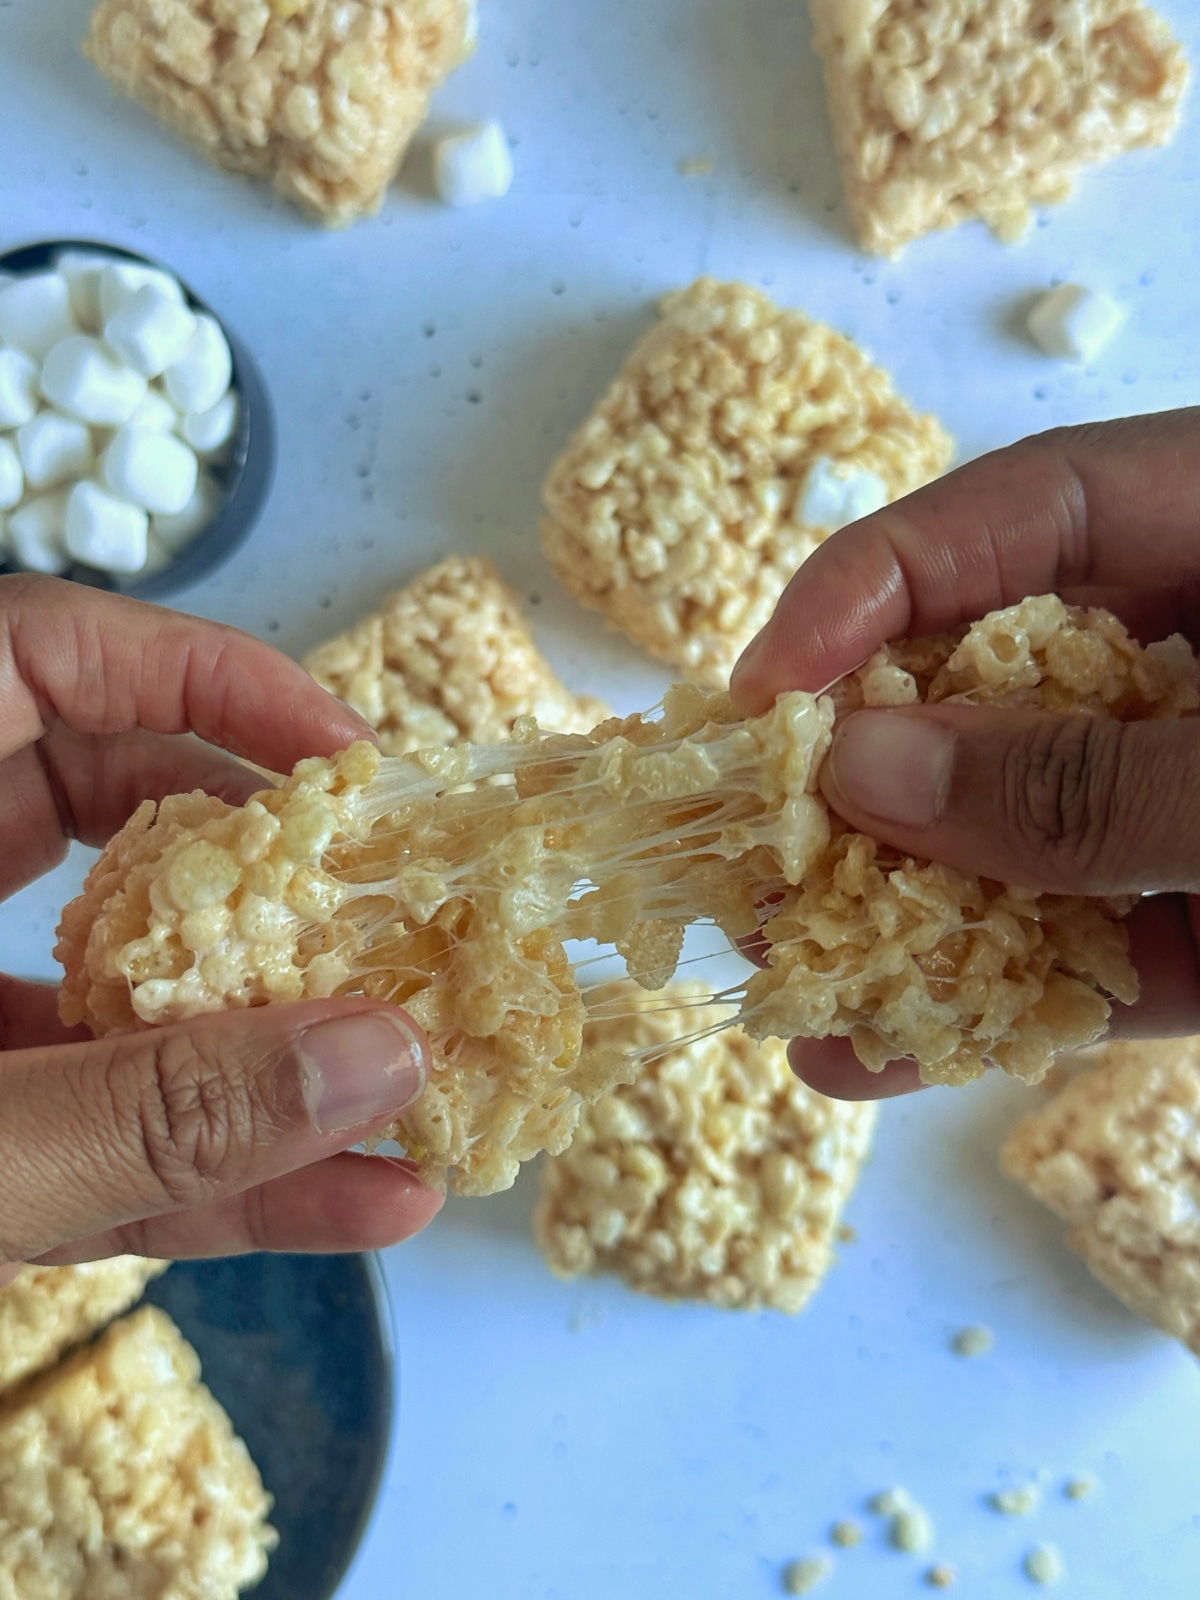
    I love a soft, chewy, marshmallow-filled Rice Krispie treat! And the homemade ones are going to be miles ahead of store-bought in terms of flavor and texture every time. Today, we're elevating this nostalgic dessert with browned butter for a hint of nutty, toffee-like flavor.

    Multiple homemade cereal bar treats laid on a counter with extra marshmallows on the side.

    The Coined Breakdown

    • Total Cost per serving: $0.22
    • Total Cost (16 bars): $3.57
    • Those Other Guys: $4.99 per bar

    Jump to:
    • Ingredients
    • Variations and Substitutions
    • How to Make Homemade Browned Butter Rice Krispie Treats
    • Recipe Pro Tips
    • Recipe FAQs
    • Other Handheld Sweet Treats You'll Love!
    • Chewy Brown Butter Rice Krispie Treats

    Ingredients

    A wooden board containing ingredients for homemade cereal treats, including butter, marshmallows, and puffed rice cereal.
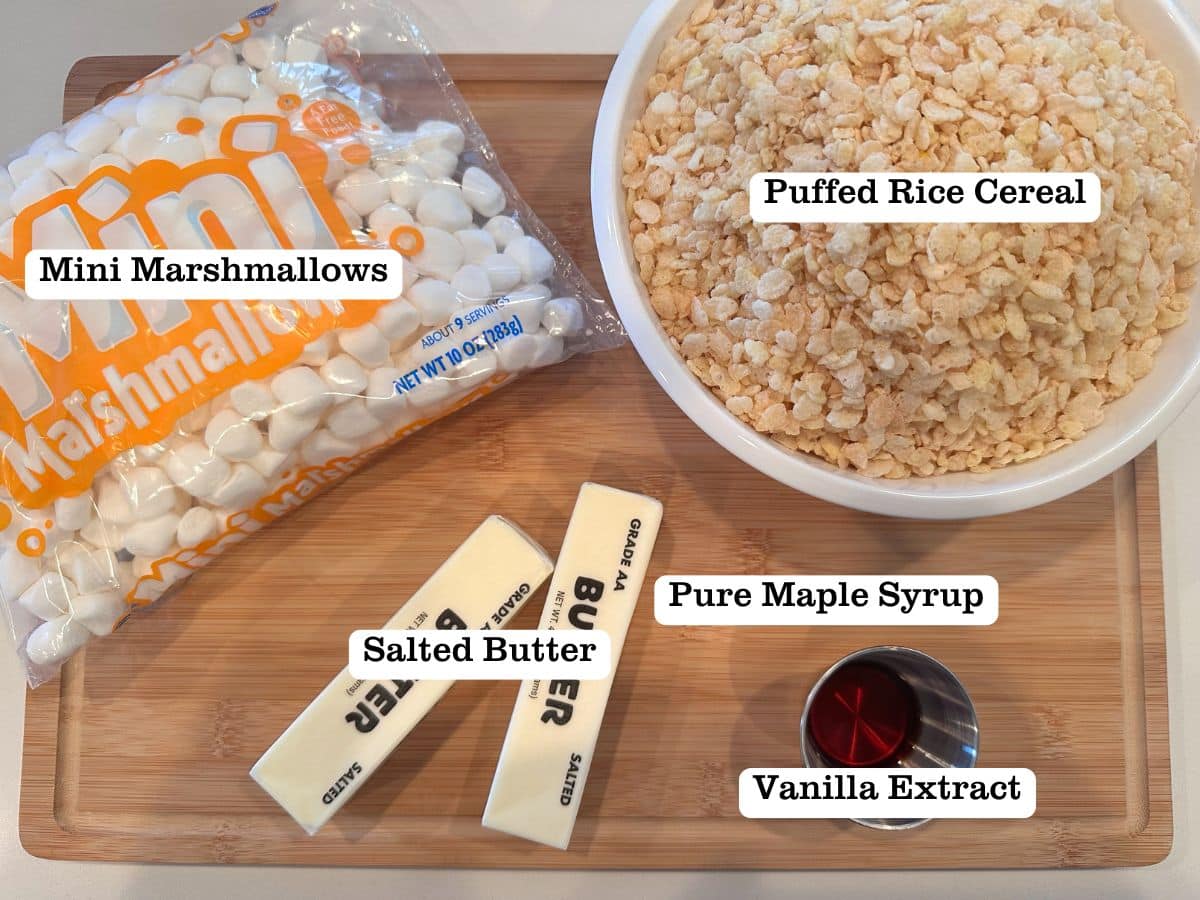
    • Puffed Rice Cereal - Either name-brand Rice Krispies or the off-brand of puffed rice cereal will work. You just want to make sure it's fresh!
    • Butter - Salted butter is a must for this recipe - trust me... it adds a depth of flavor and helps balance out all of the sweetness. If you don't have salted butter on hand, just add about ½ teaspoon of salt to your butter while browning. And use the real stuff, no margarine!
    • Marshmallows - I love an ooey gooey Rice Krispie treat, and I don't think you get that texture by using corn syrup. So marshmallows are the main squeeze in this recipe. The regular-sized ones have more center fluffiness, but the mini ones melt better (and we also mix some in at the end.)
    • Vanilla Extract - A little pure vanilla extract gives these treats such an understated flavor that you'll miss if you skip the ingredient. I like to add this in after the butter is browned, alongside the marshmallows.

    Variations and Substitutions

    Mix-In Ideas: These cereal bar treats will taste amazing with almost any sort of mix-in! Try sprinkles, crushed cookies, mini chocolate chips, chopped white chocolate, or toffee chips.

    Topping Ideas: Top these with melted chocolate (and let cool!), Homemade Buttercream, or a drizzle of melted peanut butter.

    S'mores Rice Krispie Treats: Take your taste buds on a delicious journey with my Halloween S'mores Rice Krispie Treats. These use both puffed rice cereal and graham cereal, and then we spread a layer of dark chocolate on top for even more pizzazz.

    How to Make Homemade Browned Butter Rice Krispie Treats

    A saucepan filled with browned butter, with a silicone spatula parting through the liquid.

    Step 1: To begin, brown your butter. I have a detailed post on how to brown butter if you want to learn a bit more!

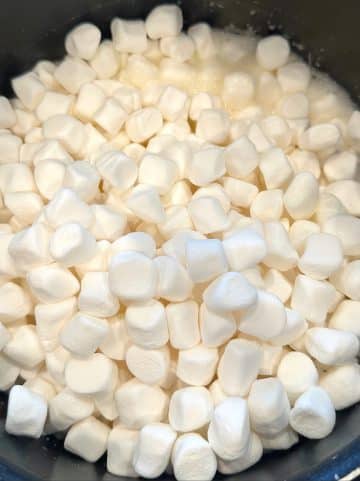
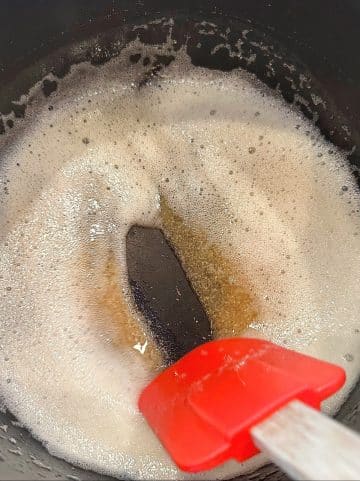
    Step 2: Once the butter has a nice, nutty aroma - turn the heat to low and add your marshmallows and vanilla extract.

    Stir well until it's silky smooth.

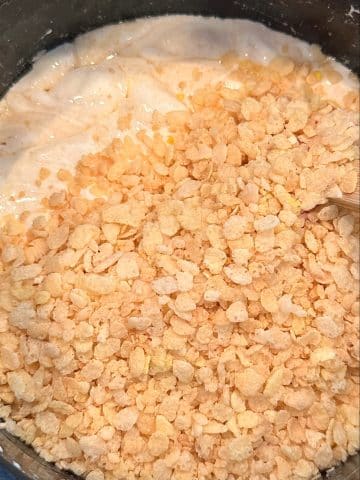
    Step 3: Pour in your puffed rice cereal.

    You can also switch this out for other types of cereal if you want!

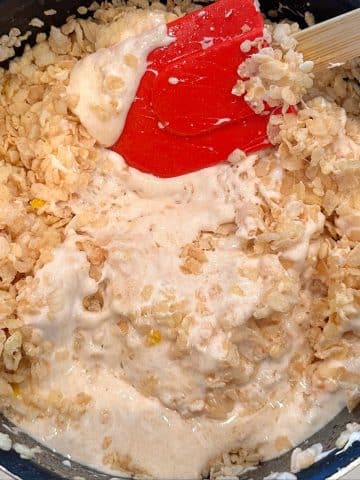
    Step 4: Fold the mixture together until it's well combined.

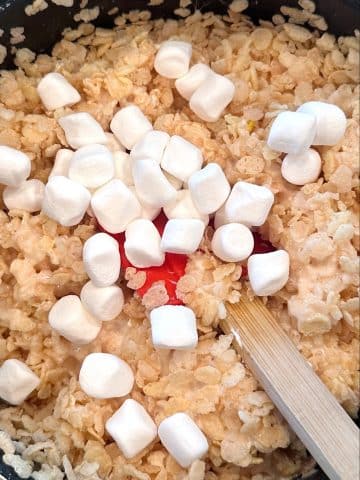
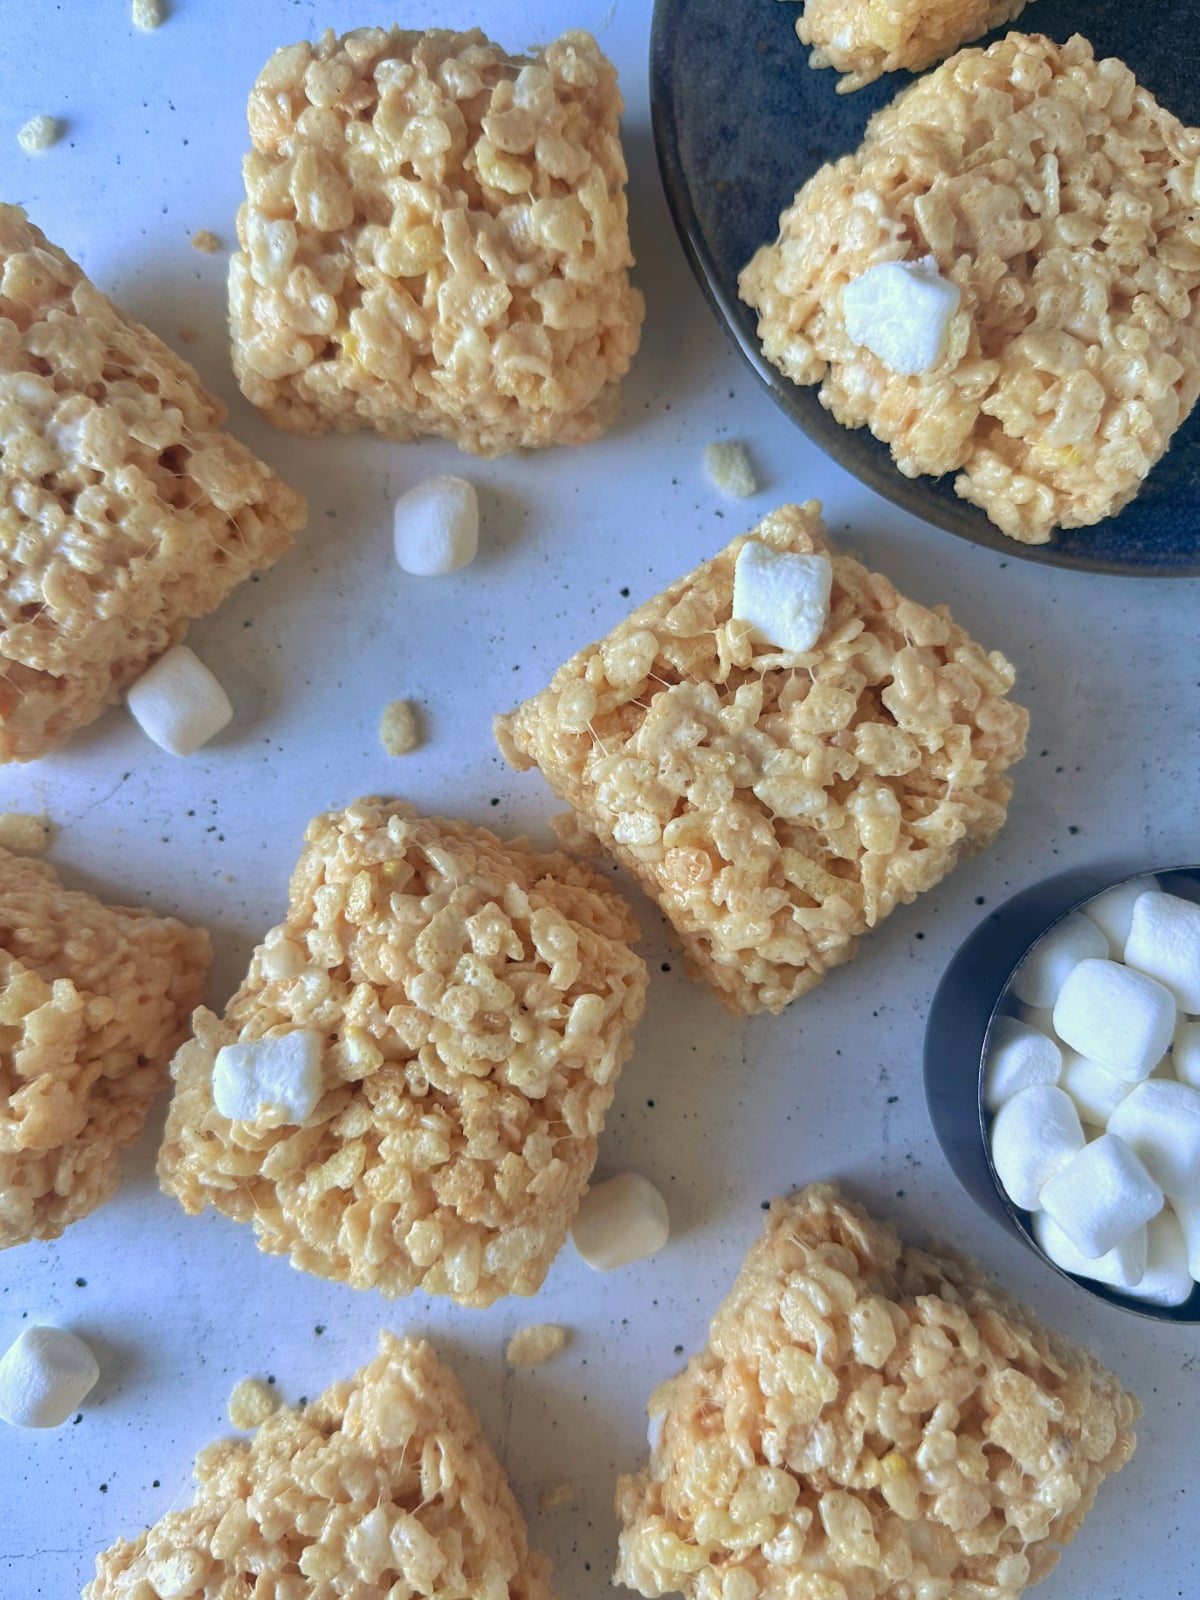
    Step 5: Add any mix-ins at this step - I always love extra mini marshmallows to get those soft pockets towards the end.

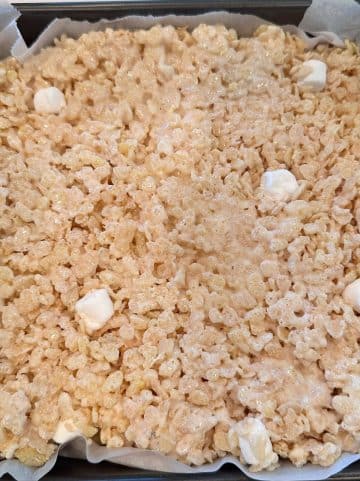
    Step 6: Finally, add the mix to a parchment paper-lined 9x9 pan.

    Gently press down into an even layer, then let cool until the bars are set. It's that easy!

    Recipe Pro Tips

    1. Watch your browned butter. If your heat is too high or you step away from the pot, your butter can turn from browned to burned really easily. Be mindful about your pot, and turn the heat to low as soon as the butter is ready.
    2. Careful with the marshmallows too. The marshmallows need to be consistently stirred into the browned butter, otherwise they can easily burn. Be sure to watch the pot.
    3. No sticky hands. Use a silicone utensil for stirring the mixture together, then press the mix into a lined pan with either a sheet of parchment paper or the leftover butter wrapper.

    Recipe FAQs

    Why are my Rice Krispie treats hard?

    If you press the mixture into the baking dish too firmly, your treats could get hard when they set. Also, be sure to use FRESH ingredients - the cereal and the marshmallows should be a new bag and freshly opened!

    How do you press down Rice Krispie treats without your hands getting sticky from the marshmallows?

    You can use a few different strategies. I like to add another piece of parchment paper down on top and then lightly press that barrier. You can also spray your hands with non-stick spray, or dip your fingers in water, shake the excess off, then press. For a no-waste option, use the butter wrapper from earlier in the recipe!

    I burned my butter. Can I salvage it somehow?

    If it isn't too burnt, you can strain the butter through a fine meshed sieve. This will remove the bitter, burnt milk solids.

    What type of butter is best for browned butter?

    A quality brand of butter with at least 82% fat is best. You can brown any type of real butter, but lower-fat types will take longer because of the increased water content.

    Can I freeze homemade browned butter Rice Krispie treats?

    Yep, these freeze beautifully for up to 4 months!

    Either wrap each treat individually in plastic wrap, or stack them in one layer on parchment paper.

    Store in an airtight freezer bag or container.

    Other Handheld Sweet Treats You'll Love!

    • A variety of Christmas-decorated cut out sugar cookies laid out next to each other.
      No Chill, Cut Out Sugar Cookies
    • A stack of three salted caramel pecan bars on a white ceramic stand.
      Salted Caramel Pecan Bars
    • Homemade creamy peach popsicles on a bowl of ice with mint leaves, sliced peaches, and a spoon of greek yogurt in the background.
      Homemade Peaches and Cream Popsicles
    • A stack of three brown sugar blondies on a crumpled piece of parchment paper.
      Brown Sugar Blondies

    If you tried this Brown Butter Rice Krispie Treats Recipe, or any other recipe on my website, please leave a star rating and let me know how it went in the comments below. I love hearing from you! Thanks for visiting!

    A stack of 3 Brown Butter Rice Krispie treats on a white countertop with more treats in the back.

    Chewy Brown Butter Rice Krispie Treats

    Shani W.
    These Brown Butter Rice Krispie Treats are extra soft and chewy, filled with a nutty browned butter flavor, and come together in less than 30 minutes for a delicious treat!
    5 from 1 vote
    Print Recipe Pin Recipe
    Prep Time 20 minutes mins
    Cooling Time 1 hour hr
    Total Time 1 hour hr 20 minutes mins
    Course Dessert
    Cuisine American
    Servings 16 bars
    Calories 166 kcal

    Equipment

    • Large Saucepot
    • Silicone Spatula
    • Parchment Paper
    • 9x9 Metal Baking Pan
    • Chef's Knife for slicing

    Ingredients
      

    Browned Butter Rice Krispie Treats

    • 9 tablespoons salted butter (½ cup plus 1 tablespoon)
    • 10 ounces mini marshmallows (plus 2 ounces more for mix-ins, see below)
    • 2 teaspoons vanilla extract
    • 6 cups Rice Krispies cereal

    Mix-Ins

    • 2 ounces mini marshmallows (about ½ cup)
    Prevent your screen from going dark

    Instructions
     

    • Line a 9x9-inch square baking pan with parchment paper.

    Browned Butter

    • Start out with browning your butter.
      I have a whole article on How to Brown Butter for more tips & tricks!
    • Slice the butter into cubes, and add to a large sauce pot.
      9 tablespoons salted butter
    • Melt on medium-low heat, stirring consistently.
    • The butter will begin to form a layer of foam on top, and browned bits (these are milk solids) on the bottom of the pan.
    • Once the butter is amber colored and has a deep, nutty aroma, it's time to go to the next step to assemble the treats.

    Rice Krispie Treats

    • Turning the heat to low, pour 10 ounces of mini marshmallows and vanilla extract right into the brown butter.
      10 ounces mini marshmallows, 2 teaspoons vanilla extract
    • Stir continuously using a silicone spatula/spoon until the marshmallows are completely melted and smooth.
    • Remove the pan from heat and stir in the Rice Krispie cereal plus the remaining 2 ounces of mini marshmallows. Stir well until combined.
      If you have any additional mix-ins (sprinkles, crushed cookies, etc.) stir them into the mixture at this step as well.
      6 cups Rice Krispies cereal, 2 ounces mini marshmallows
    • Pour the Rice Krispie treat mixture into the prepared baking pan. Press gently with a square of parchment paper + your fingers to spread it out to the edges.
      The harder you pack your mix into the pan, the harder the treats will be once they set. We want these to be nice and gooey!
    • Let the pan cool in the refrigerator for 20 minutes, or on the counter at room temperature for about 40 minutes.
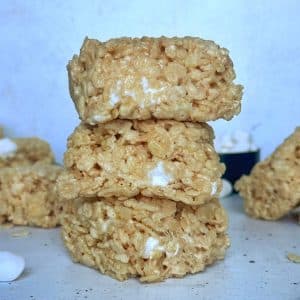
    • Cut into 16 even squares and serve. Enjoy!

    Notes

    Tips & Tricks:
    To avoid messy fingers, use a silicone spatula/spoon or a square of parchment paper to spread the mixture into the pan.
    Storage Instructions:
    These will keep on the counter at room temperature for up to 4 days. They will last another 2 days in the refrigerator, but I recommend letting them thaw before enjoying.
    Freezing Instructions: 
    These freeze beautifully for up to 4 months.
    1. You can wrap each individual bar in plastic wrap, and then add the wrapped treats to a large airtight freezer bag or container.
    2. You can also stack layers of bars in between parchment paper. Store them in a large airtight freezer bag or container.
    When you're ready to eat, simply let the treats thaw until softened before enjoying.

    Nutrition

    Calories: 166kcal | Carbohydrates: 26g | Protein: 1g | Fat: 7g | Saturated Fat: 4g | Polyunsaturated Fat: 0.3g | Monounsaturated Fat: 2g | Trans Fat: 0.3g | Cholesterol: 17mg | Sodium: 123mg | Potassium: 17mg | Fiber: 0.1g | Sugar: 13g | Vitamin A: 895IU | Vitamin C: 7mg | Calcium: 3mg | Iron: 3mg
    Tried this recipe yet?Please consider leaving a comment! Reviews help other readers find their next favorite dish, like this one.

    More Desserts

    • A bowl filled with scoops of peach ginger sorbet with mint leaves on top.
      Peach Ginger Sorbet
    • Homemade strawberry pop tarts with red and pink sprinkles on a wire rack.
      Strawberry Pop-Tarts
    • A bowl filled with scoops of Lemon Blackberry Ice Cream with another container of berries on the side.
      No-Churn Lemon Blackberry Crisp Ice Cream
    • A pan of sliced crinkle top brownies with one turned to the side to show the inside texture.
      Fudgy Crinkle Top Brownies

    Comments

      5 from 1 vote

      Did you make this recipe? Let me know what you think! Cancel reply

      Your email address will not be published. Required fields are marked *

      Recipe Rating


    1. Ruth Everian says

      January 29, 2026 at 2:05 pm

      5 stars
      Omgeeee these are soo good! Me and my kids loved the taste! I also used your brown butter recipe so I wouldn’t screw that up!

      Reply
      • Shani H. says

        January 29, 2026 at 3:10 pm

        Aww thank you so much Ruth! Glad that the family loved them 🙂

        Reply
    Headshot of Shani, founder of Coined Cuisine

    Welcome!

    I'm Shani, the founder of Coined Cuisine. I develop budget-friendly recipes that are tasty and easy to create. Whether you're a beginner cook or an advanced kitchen wizard, you're sure to find tons of meal inspiration here!

    More about me

    Cinco de Mayo Recipes

    • A bowl of Mexican red rice with a lime quarter and a few sprigs of cilantro.
      Mexican Red Rice (Arroz Rojo)
    • A chimichurri steak taco made with flank steak and a corn tortilla.
      Chimichurri Flank Steak Tacos
    • A black bowl containing the ingredients for a Shrimp Burrito Bowl, with other toppings on the side.
      Spicy Shrimp Burrito Bowls
    • A hand dipping a tortilla chip into fire roasted salsa
      Restaurant-Style Fire Roasted Salsa
    • A tray of crispy chipotle chicken tacos with bowls of sour cream and guacamole.
      Crispy Chipotle Chicken Tacos
    • A stack of four Spinach Dip Quesadillas on a wooden board.
      Spinach & Artichoke Dip Quesadillas

    Springtime Essentials

    • A bowl filled with scoops of Lemon Blackberry Ice Cream with another container of berries on the side.
      No-Churn Lemon Blackberry Crisp Ice Cream
    • A tray of mini croissant sandwiches filled with shrimp salad.
      Easy Cold Shrimp Salad on Croissants
    • A glass of Brazilian lemonade with a lime wedge on the side of the cup, plus a metal straw sticking out.
      Brazilian Lemonade
    • A chopstick holding up a roasted balsamic brussels sprout over a full bowl.
      Roasted Balsamic Brussels Sprouts
    • A white plate containing Samoa Coconut & Date Caramel apples with a chocolate drizzle.
      Samoa Caramel Apples (with Date Caramel)
    • A plate of chicken gyros wrapped in foil, with a hand lifting one off of the others.
      Greek Chicken Gyros

    As Seen In

    Footer

    ↑ back to top

    About

    • About Coined Cuisine
    • Privacy Policy
    • Accessibility

    Newsletter

    • Sign up for emails and updates

    Contact

    • Contact
    • FAQ

    Copyright © 2025 Foodie Pro on the Feast Plugin

    Rate This Recipe

    Your vote:


    A rating is required
    A name is required
    An email is required

    Recipe Ratings without Comment

    Something went wrong. Please try again.