
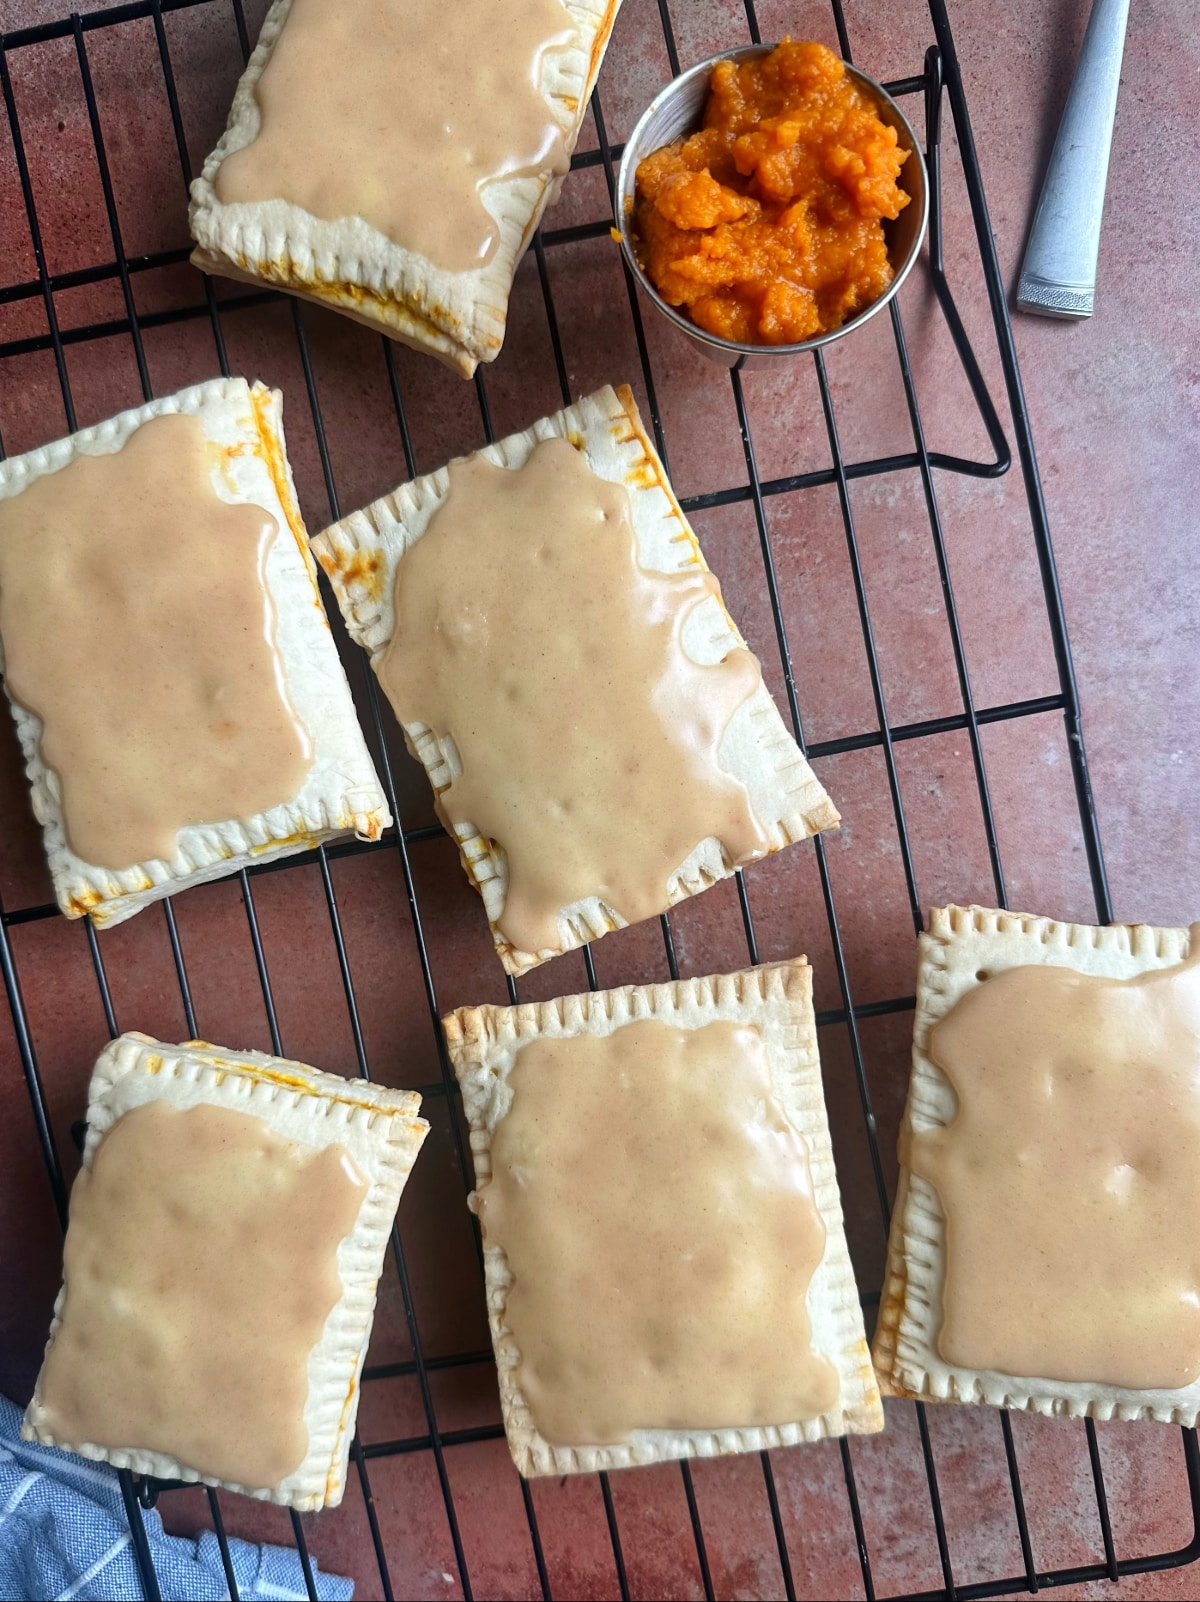
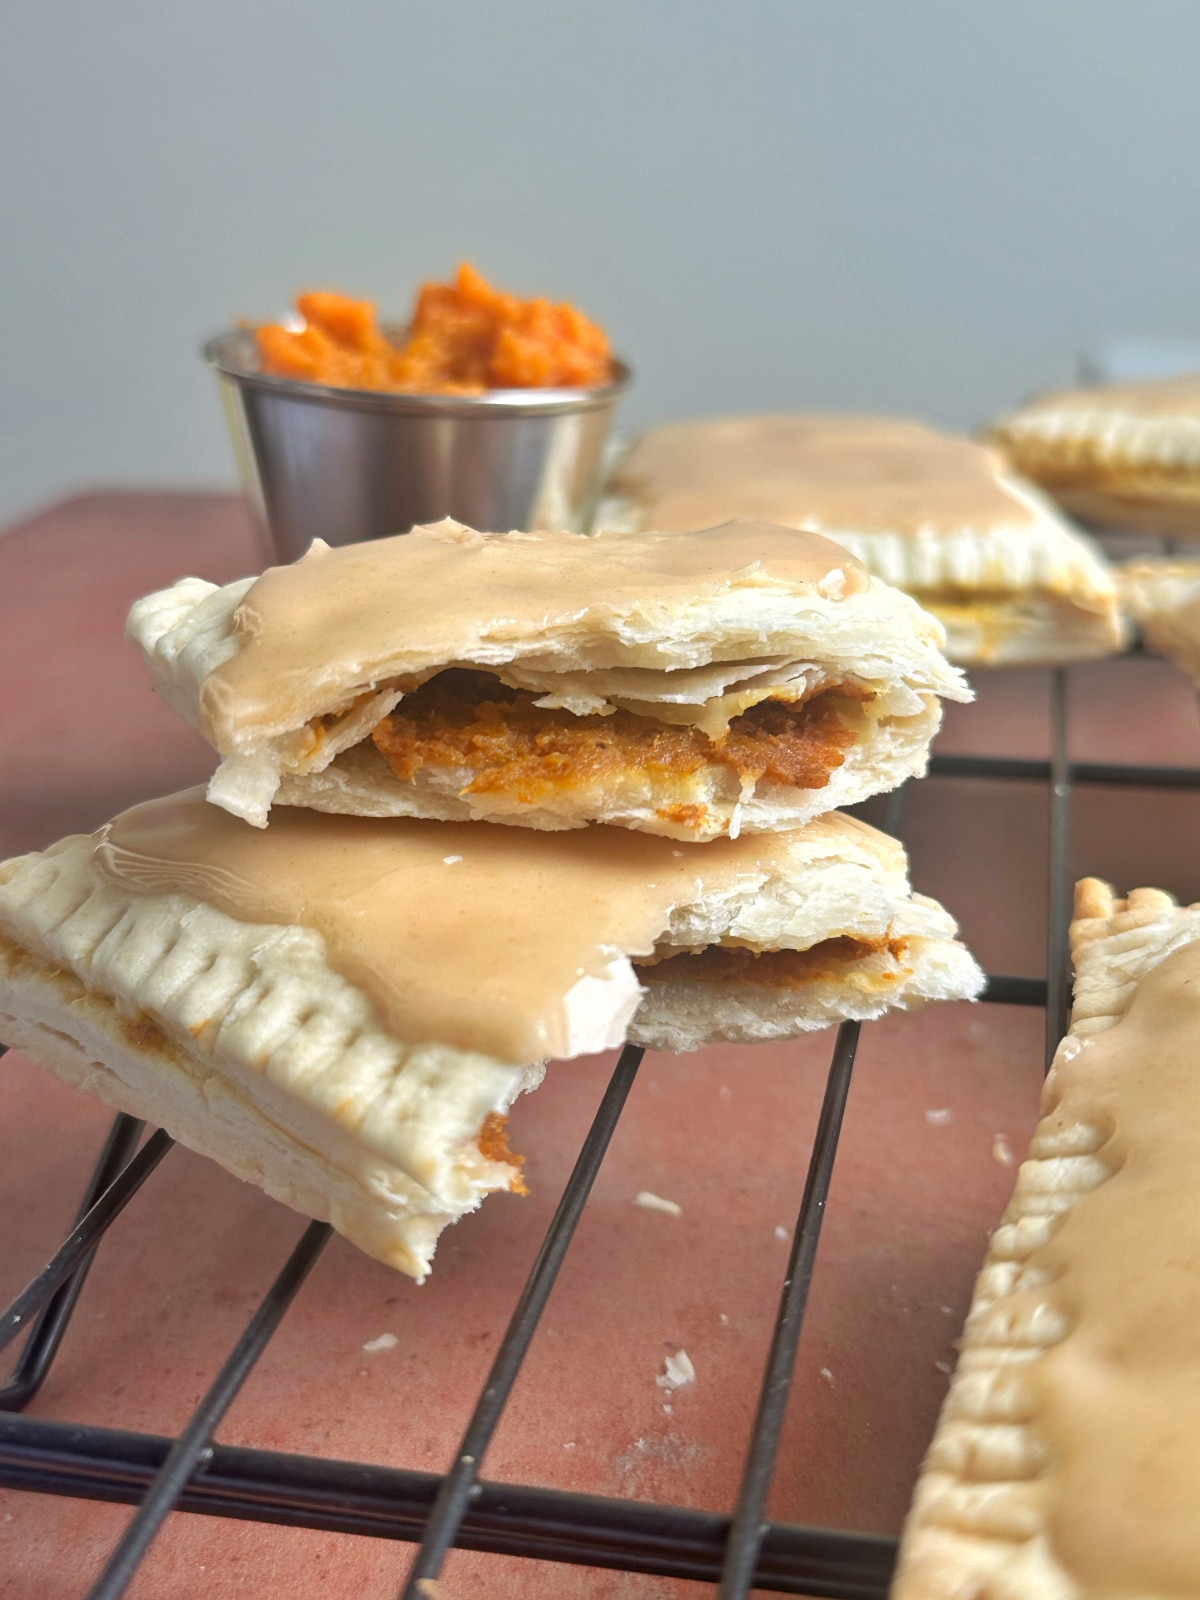
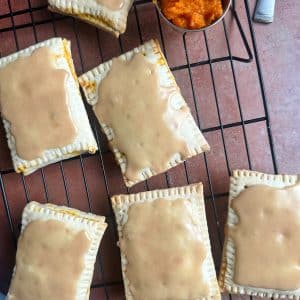
Pumpkin Pie Pop-Tarts are flaky pastries packed with a warm pumpkin pie filling and topped with maple-cinnamon icing. These are the perfect flavor combination of sugar and spice for a Fall treat that's oh so nice!
These homemade pop tarts are such a great snack year-round, but especially during pumpkin season. I'm more Team Sweet Potato, but the spice blend and homemade icing (with no weird ingredients like the store-bought kind!) really elevates the taste of this humble gourd.
The Coined Breakdown
- Total Cost per serving: $0.57
- Total Cost (6 pastries): $3.39
- Those Other Guys: $2.99 per box
Ingredients
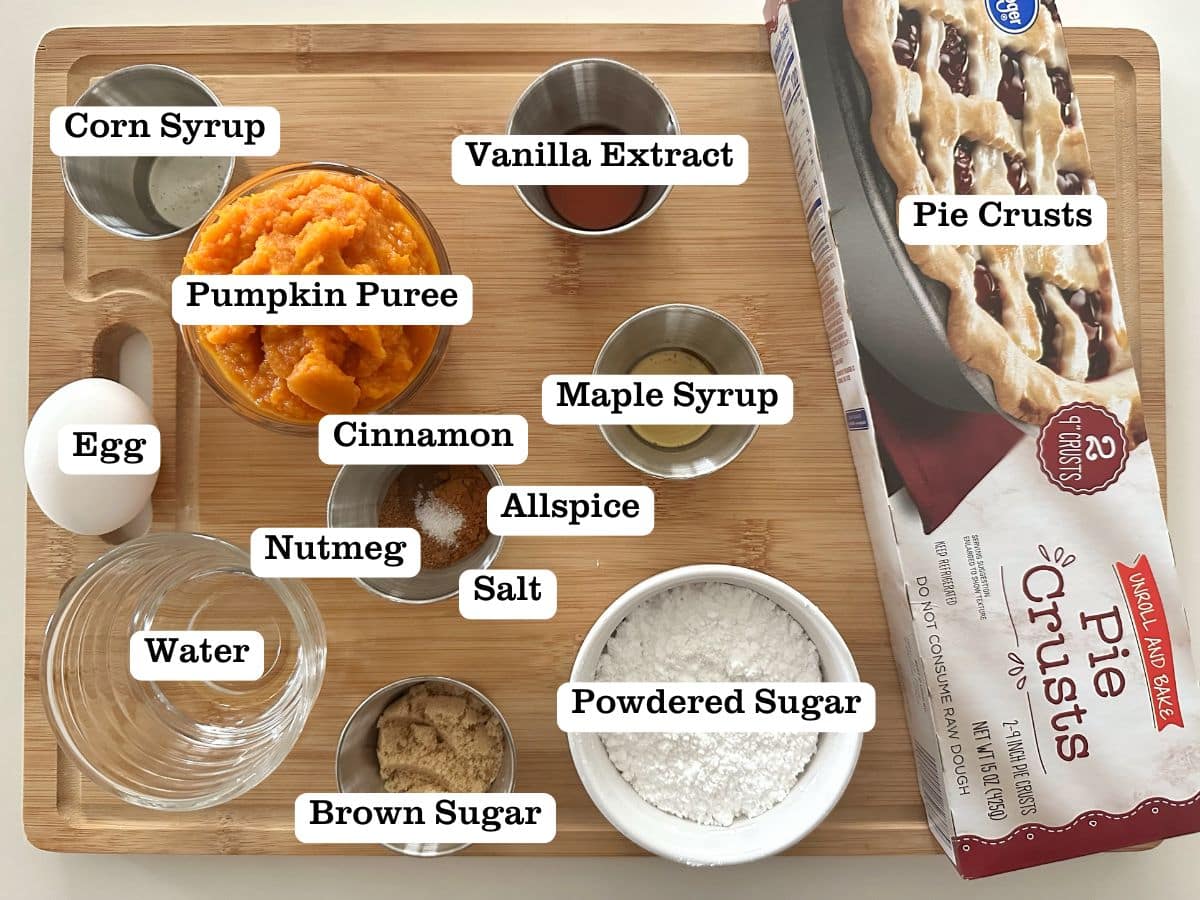
- Pie Crusts - Use your favorite homemade recipe, or grab the store-bought kind. No judgement either way!
- Pumpkin Puree - Now make sure you get pure pumpkin puree - not pumpkin pie filling. There's a difference, and we want to dress it up with our own spice blend.
- Spice Blend - The perfect blend of spices is going to take our pumpkin filling to the next level. Think brown sugar, cinnamon, nutmeg, allspice, a pinch of salt, and a hint of vanilla extract. Yum!
- Maple-Cinnamon Glaze - It's super easy to make this icing. Just mix together powdered sugar, corn syrup, maple syrup, cinnamon, and a tiny amount of salt. It should form a thick icing that's perfect for spreading.
Variations and Substitutions
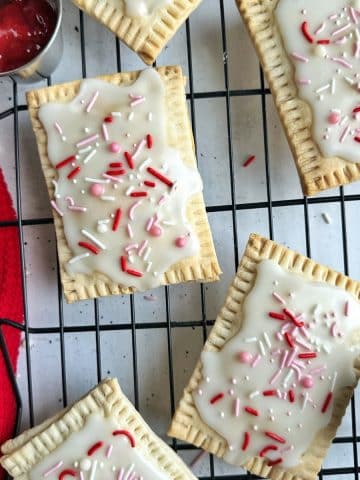
Strawberry Pop-Tarts: The classic flavor. These pop-tarts are filled with a smooth, reduced jam and topped with icing and sprinkles for fun!
Chai Pumpkin Pop-Tarts: Instead of cinnamon, try adding chai spice to the filling and icing for a cozy twist on a classic drink.
Sweet Potato Pop-Tarts: You can use canned sweet potato puree (or freshly roasted and cooled sweet potato) as the filling instead of pumpkin.
Royal Icing or Cookie Icing: You can use either royal icing or sugar cookie icing on these cookies! The cookie icing uses corn syrup; it comes together easier, but takes longer to completely dry. Royal icing uses merengue powder which is a more specialty ingredient; but it dries in about an hour for stacking and transporting.
How to Make Pumpkin Pie Pop Tarts at Home
Making the filling is super simple since we use canned pumpkin puree. Below, I go into a little more detail on assembling each pastry for the best results!
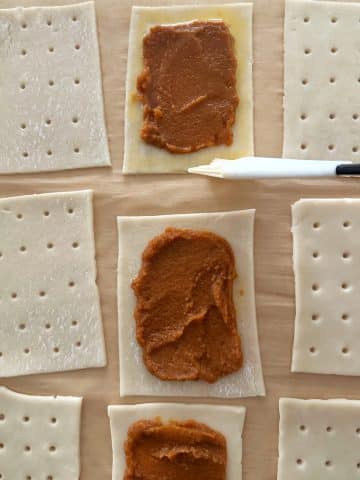
Step 1: After mixing together your filling, cut the pie dough into 12 even rectangles. I like to make a stencil out of parchment paper.
Step 2: Poke holes into 6 rectangles; this will be your top crusts. Go ahead and add a little over a tablespoon of filling to the bottom crusts.
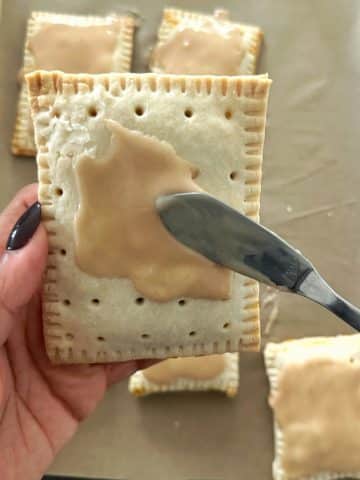
Step 3: Brush the borders with egg wash, then place the top crusts on top and crimp the edges together using a fork.
Step 4: After the pop-tarts bake and cool, create your icing and make it thick enough to spread. Add the glaze to the cooled pastries and let it set. That's it!
Recipe Pro Tips
- Don't let the filling spill out! There's a few tricks to keep your filling contained within the pop tart. First, leave a ⅜th-inch border between the filling and the edge of the pastry. Next, don't smash down the top pastry when placing it on the filling. And finally, when you're sealing with a fork: seal the right side first, then the left. Then seal the top and bottom. I've found crimping in a clockwise or counter-clockwise direction tends to make the pastries shift.
- Keep the icing thick. Add just a tiny amount of water at a time to thin the icing - if needed. You want it to be thick enough, almost like peanut butter, to spread; a thin icing will fall right off the pastry. Simply add a small amount of frosting (probably less than you think you need) and distribute it with a spatula.
Recipe FAQs
Both versions taste delicious on these pumpkin pie pop tarts! It's really up to you.
Cookie Icing: Uses more common pantry ingredients, but takes at least 18 hours to set. You can eat it almost immediately, but do not stack or transport the pastries before it has fully dried. This icing also is not toaster-safe.
Royal Icing: Uses merengue powder which is more of a specialty ingredient, but fully dries in 1 - 2 hours. Homemade pop tarts topped with royal icing can be heated up in the toaster.
There could be a few reasons why this is happening.
1. Vent the pastry. Don't forget to add ventilation holes to the top crusts! This way, steam has somewhere to escape.
2. Too much filling. Leave a ⅜-inch border between the filling and the pastry edge.
3. Be gentle. Don’t smash down the top pastry; just lightly place it on top of the filling to avoid spreading.
4. Seal opposite sides first. When sealing with a fork, seal one side first, then go to the opposite side and seal. In other words; don’t seal in a clockwise or counter-clockwise direction. I've found this causes the pastry sheets to move around.
Yes, you can make homemade pop tarts up to 3 days ahead! Simply bake, let cool completely, and ice with the glaze. Then store in an airtight container in the refrigerator.
When you're ready to eat, you can let the pastries come to room temperature on the counter or reheat in a toaster oven/microwave until just warm.
Yes, these can be frozen.
Add the pastries (after the icing has fully dried) to a freezer-safe bag or container, and freeze for up to 4 months. When you're ready to serve, let the pop-tart come to room temperature on the counter before eating.
Other Easy-to-Make Snacks You'll Love!


If you tried this Pumpkin Pie Pop-Tarts Recipe, or any other recipe on my website, please leave a star rating and let me know how it went in the comments below. I love hearing from you! Thanks for visiting!
Pumpkin Pie Pop-Tarts
Equipment
- Mixing Bowl
- Can Opener
- Spoon for mixing
- Rolling Pin
- Knife or pizza cutter!
- Pastry Brush
- Fork to crimp edges
- Sheet Pan
- Parchment Paper
- Kitchen Scissors
- Wire Rack
Ingredients
Crust
- 1 box refrigerated pie crusts (2 ct. each)
- 1 count egg (for egg wash)
Pumpkin Pie Filling
- ½ cup pure pumpkin puree
- 1 tablespoon brown sugar
- ½ teaspoon ground cinnamon
- ¼ teaspoon ground nutmeg
- 1 pinch allspice
- 1 pinch salt
- 1 teaspoon pure maple syrup
- ½ teaspoon vanilla extract
Maple-Cinnamon Icing
- ¼ cup powdered sugar (2 ounces)
- 1 tablespoon corn syrup (or ½ tablespoon merengue powder - see notes below)
- ½ teaspoon maple syrup
- ¼ teaspoon ground cinnamon
- 1 pinch salt
- water (to thin)
Instructions
- Sit the pie crusts on the counter and let them come to room temperature.1 box refrigerated pie crusts (2 ct. each)
- Crack the egg in a small bowl and whisk to create an egg wash. Set aside.1 count egg
Pumpkin Pie Filling & Assembly
- Preheat your oven to 350℉.
- In a large bowl, combine the pumpkin puree, brown sugar, cinnamon, nutmeg, allspice, and salt.Stir in the maple syrup and vanilla extract.½ cup pure pumpkin puree, 1 tablespoon brown sugar, ½ teaspoon ground cinnamon, ¼ teaspoon ground nutmeg, 1 pinch allspice, 1 pinch salt, 1 teaspoon pure maple syrup, ½ teaspoon vanilla extract
- Roll the pie crusts to about ⅛-inch thickness.
- Cut out 12 even-sized rectangles. You will need to combine the scraps and roll them back out into a thin sheet, so you can use up all of the crust.To get even shapes, cut out a "stencil" that's 3 inches long and 4.5 inches tall using parchment paper.
- Poke holes into 6 of the rectangles - this will be the top crusts.
- Add about 1-2 tablespoons of filling to the middle of the 6 bottom crusts; these are the ones without any ventilation holes.Spread the filling into a rectangle, leaving about a ⅜-inch border for sealing.
- Brush your egg wash on the border. Then, top each pastry with the top crusts.
- Crimp and seal the edges with a fork.
- Add all six pastries to a parchment paper-lined sheet pan. Bake for 18-20 minutes until they just begin to take on some color.
- Remove from the oven, and transfer to a wire rack to cool completely.
Maple-Cinnamon Icing
- In a small bowl, combine all icing ingredients except for the water.¼ cup powdered sugar, 1 tablespoon corn syrup, ¼ teaspoon ground cinnamon, 1 pinch salt, ½ teaspoon maple syrup
- Add a tiny amount of water, if necessary, to thin it out. The consistency should be very thick and able to spread easily - almost like peanut butter.water
- Top the pop tarts with the maple-cinnamon glaze and let them rest until the glaze has set. Enjoy!
Notes
- Sugar Cookie Icing is made with corn syrup. The syrup helps bind the ingredients together and causes the icing to dry with a beautiful glossy top. It fully sets after 18 hours, so do not stack or transport the pastries before then.
- Royal Icing is made with egg whites, or meringue powder. It's not overly sweet, and can be piped easily for more control over designs. This icing fully dries in about 2 hours.


Jeri Chapman says
These were delicious. I normally dislike canned pumpkin pie filling so making our own seasonings was a great idea.
Shani H. says
Same here! Thank you for leaving a review, Jeri!