
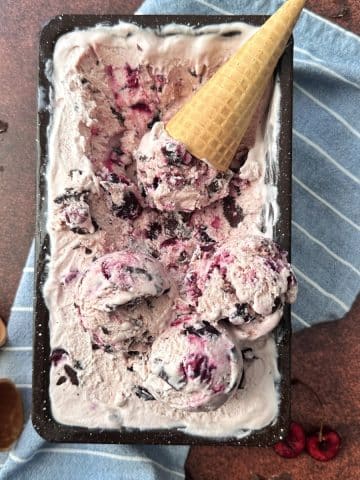
No ice cream machine required - this No-Churn Cookies & Cream Ice Cream has only five ingredients and is a perfect, easy summer dessert that your whole family will devour!

For all of my ice cream lovers, you can make your own batch right at home with ease using a mixer and a loaf pan. The absolute hardest part of this recipe is waiting for it to freeze! If you're craving more fruit or citrus-flavored desserts, try my homemade Orange Creamsicle Popsicles!

The Coined Breakdown
- Total Cost per serving: $0.60
- Total Cost (about 12 servings): $7.14
- Those Other Guys: $4.49 per serving
Ingredients

- Heavy Whipping Cream - Sometimes it's just called heavy cream on the container. We're going to whip this up to give our ice cream a nice, fluffy texture.
- Sweetened Condensed Milk - A can of this will provide the perfect amount of sweetness and help the ice cream freeze correctly.
- Chocolate Sandwich Cookies - You can't have cookies & cream flavor without these! I like to chop some into big chunks, and then crumble some of them into smaller pieces so you get a different texture of bite each time.
- Salt - It sounds a bit weird, but a pinch of salt will balance out the sweetness of the other ingredients.
- Vanilla Extract - This ingredient gives our vanilla ice cream base a pop of flavor. If you have vanilla bean pods, those work great in this recipe.
Variations and Substitutions
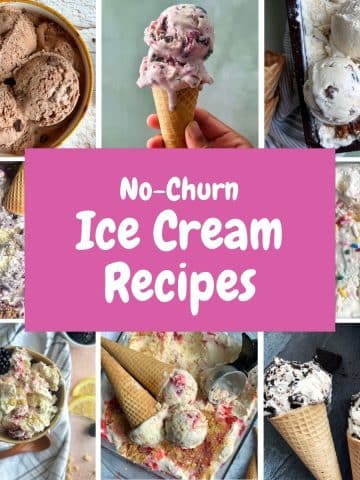
I have a recipe roundup post on so many different No-Churn Ice Cream Ideas. You can find delicious variations like Double Dark Chocolate Ice Cream, Blueberry Crumble Ice Cream, and Cherry Chip Ice Cream. Be sure to check it out for more flavor inspiration!
How to Make Cookies and Cream Ice Cream Without an Ice Cream Maker
And no, you don't need a plastic bag, some rock salt, or a lot shaking either!

Step 1: To a cold mixing bowl, add your heavy cream, vanilla, and salt.
Whisk on low speed until medium peaks form.

Step 2: Pour in a can of sweetened condensed milk.

Step 3: Stir well using a wooden spoon. Your mixture will be light and airy like this.
Fold in the chopped chocolate sandwich cookies, then pour everything into a loaf pan.

Step 4: Cover with a layer of plastic wrap, then a layer of aluminum foil.
Freeze for at least 4 hours, but overnight is best. It's that easy!
Recipe Pro Tips
- Chill your tools. Add your whisk attachment and mixing bowl to the freezer for about 5 minutes before whipping the heavy cream. This keeps everything nice and cold!
- Don't overmix the cream. If you use too high of a speed to mix the cream, your whipped cream can curdle. To stabilize the whipped cream and get it nice and smooth again, simply fold in a little more cold heavy cream by hand using a spatula until it evens out. Be gentle!
- Create some texture variety. Try to have different sized chunks of cookies when crushing. A good mix of larger chunks and smaller crumbs makes for a great cookies and cream ice cream.
- Cover twice. Cover the loaf pan with plastic wrap, then wrap with aluminum foil. We don't want the ice cream to taste like freezer.
- Be patient. Be sure to let the ice cream set fully. Four hours in the freezer is the absolute minimum, but I always recommend overnight for best results.
Recipe FAQs
This usually happens due to overmixing. You can pour in just a little bit of cold heavy cream into the bowl, and gently hand-fold it into the curdled whipped cream using a spatula until it smooths out. I also recommend placing your mixing bowl and tools into the freezer before whipping cream to keep everything as cold as possible.
Sure can! Most brands of the sandwich cookies are already vegan, so we just have to look at the cream and sweetened condensed milk.
I've used non-dairy heavy cream in this recipe with great results. You can also find vegan sweetened condensed coconut milk, or make your own using oat or almond milk.
You definitely can. It'll take a bit of arm strength, but you can hand whisk the heavy cream using a metal whisk, then the rest of the recipe is just folding in the remaining ingredients.
Not at all! While many recipes (especially those that require an ice cream maker) call for milk or eggs, my no-churn ice cream recipe doesn't need either of those.
I like to store in deli containers if the ice cream will be eaten within a week, or add it to an airtight container and it will keep for up to 3 weeks.


If you tried this No-Churn Cookies and Cream Ice Cream Recipe, or any other recipe on my website, please leave a star rating and let me know how it went in the comments below. I love hearing from you! Thanks for visiting!

No-Churn Cookies and Cream Ice Cream
Equipment
- Chef's Knife or food processor/storage bag
- Mixing Bowl
- Stand Mixer or hand mixer
- Whisk Attachment
- Wooden Spoon
- Loaf Pan
- Plastic Wrap
- Aluminum Foil
Ingredients
- 1 pint heavy whipping cream
- 1 teaspoon vanilla extract
- 1 pinch salt
- 14 ounces sweetened condensed milk
- 150 grams chocolate sandwich cookies chopped into chunks and small crumbs
Instructions
- Place your mixing bowl and whisk attachment in the freezer for 5 minutes.
- Add the heavy cream, vanilla extract, and a pinch of salt to the mixing bowl.1 pint heavy whipping cream, 1 teaspoon vanilla extract, 1 pinch salt
- Using a stand or hand mixer, beat the cream mixture with a whisk attachment until medium peaks form, about 3-4 minutes on low speed.
- Stir in the sweetened condensed milk using a wooden spoon. The mixture should be thin and silky smooth.14 ounces sweetened condensed milk
- Fold in the chopped cookie pieces until well distributed.150 grams chocolate sandwich cookies
- Add the mixture to a 9x5 loaf pan. Top it with a few more crumbled cookies.
- Cover the loaf with plastic wrap, then aluminum foil. Freeze for at least 4 hours, but up to overnight. Enjoy!


Beej B says
Speaking from having experienced this delicious treat for myself. This recipe is worth tasting. 10/10 would definitely recommend.
Shani W. says
Thank you so much for your review Beej!
Havier says
LET ME TELL YOU !! This recipe is had my entire family wanting more! Very easy to follow and does not take long to assemble. If your looking to save on trip to the grocery store or ice cream shop this is the perfect recipe!
Shani W. says
Thank you so much for commenting Havier! So glad you guys all loved it 🙂